Configuring End point to expose the AD FS to public
As we are planning to consume this AD FS into ACS, we must configure endpoint for that Virtual Machine to expose.
So open the Management Portal and navigate to the Virtual Machine created. Select the Endpoints tab and add two endpoints as below.

Access the Federation metadata from Internet
Open the browser in any system which connected to internet and access the federation metadata with the url as defined below.
https://azurepoc.domainname.com/FederationMetadata/2007-06/FederationMetadata.xml
Here the domainname.com is my test domain and azurepoc is the sub domain created. You have to change as per the settings you have.
The browser must show the xml format metadata without any certificate error as below.

Sometime, when accessing the url in the browser, it never show the xml script. But, after I tried accessing it in Federation Urility window (Add STS Metadata), it starts working.
Note: If the federation metadata is not accessible to outside of the Virtual Machine and any certificate error shows on the address bar, this POC will not work :(.
Creating an MVC application
Step 1: Create an empty MVC application in Visual Studio with project name as ACSADFSFed. (I am creating MVC application with Basic MVC 4 template).


Step 2: Add control by right click the Control folder by selecting Add -> Controler menu. Name the controller as HomeController.

Step 3: Add a folder Home in the View folder by right click the View and selecting New Folder menu.
Step 4: Add a new view under the Home folder and name it as index by right click the Home folder and select View menu.

Step 5: Make sure the following Index method in the HomeController created in Step 2.

Visual Studio will create a Virtual Directory for that project.
Step 7: Run the application and verify runs without error.

Step 8: Note the url of the application. That will be used while configuring ACS.
Creating and Configuring ACS namespace
Step 1: Open Production Management Portal (http://windows.azure.com/) and select Service Bus, Access Control and Caching section.
Step 2: Select Access Control from the Services in the left panel and create a new namespace by selecting New icon. I am creating a new namespace TADFSTest.

Windows Azure will create a namespace with the mentioned name and bring active.
Step 3: Select the namespace created and press Access Control Service icon from the top.

Portal will show Access Control Service configuration portal.
Step 4: Select Identity Providers and click Add hyperlink to add a new identity provider.

Portal will bring you Add Identity Provider screen.
Step 5: Make sure WS-Federation identity provider (e.g. Microsoft AD FS 2.0) selected and press Next.
Step 6: Select URL option under the WS-Federation metadata section and provide the federation URL we tested previously (from Access the Federation metadata from Internet section).
Provide a meaningful descriptive name in the Display name and Login link text fields and press Save.

The portal will add the identity with ACS and show in the Identity Providers list.

Note: If the certificate is not trusted, there will be an error and will not add in the list.
Step 7: Select Relying Party Applications menu and click Add.

The portal will show Add Relying Party Application screen.
Step 8: Provide the details of the Relying Party Application as below
Name: Any descriptive understandable name
Realm and Return URL: Application URL which noted in Creating an MVC application Step 7.
Make sure the new Identity provider created is selected (that has our ADFS federation metadata) and Create new rule group is checked.

Save the details.
Step 9: Navigate to the Rule Group and select Default Rule Group for the Relying party just added (Default Rule Group for ACS ADFS Fed POC).

Step 10: Portal will open Edit Rule Group screen. Click Generate hyperlink.

Portal will show Generate Rules screen.
Step 11: Press Generate button. ACS will add all possible rules in the Rules list.

Note: As this is for testing, I am adding all possible rules. For production, we can add only which all required.
Step 11: Select the Application integration under Development section from the left panel and select the WS-Federation Metadata URL.

This metadata url will be used in our application for configuring ACS.
Consuming ACS namespace in Web application
Now, we have completed ACS settings. We can again switch to application and configure the ACS authentication.
Note: Make sure WIF and WIF SDK installed in the system and Add STS reference enabled in the menu when right click the application. Sometimes the Add STS reference menu won’t be enabled even the WIF SDK installed. To enable the menu, open the Visual Studio Command Prompt and navigate to the Common\IDE folder of Visual Studio installation path. For 32 bit system the path will be C:\Program Files\Microsoft Visual Studio 10.0\Common7\IDE.
Run the following command and restart the Visual Studio.
devenv /ResetAddin Microsoft.IdentityModel.Tools.VS.VSAddin.FederationAddin
Step 1: Right click the project and select Add STS reference.

Step 2: Fill the application url which was set in Project properties (Creating an empty MVC application -> Step 7) and press Next.

As my site url does not have SSL enabled, it will show a warning message. I press Yes.
Step 3: Select Use an existing STS and provide the WS-Federation Metadata URL noted from ACS in previous section.

Press Next.
Step 4: Press Next from STS signing certificate chain validation error screen as this is a testing site and we don’t want any certificate validation.

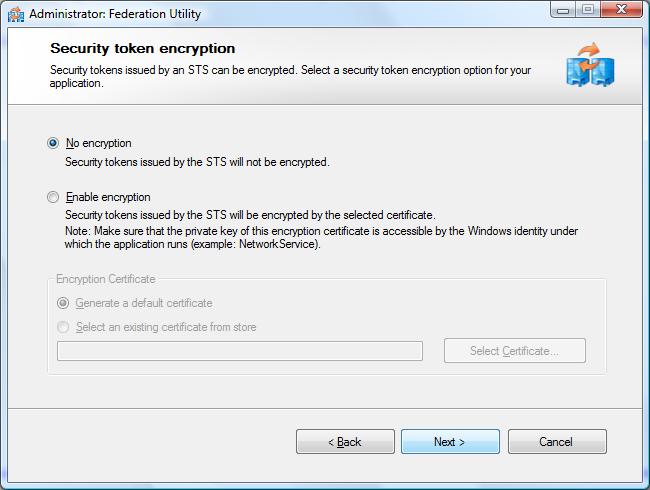
Step 5: Press Next from Security token encryption screen.

Step 6: Review the Offered claims and press Next.

Step 7: Review the Summary and press Finish.
Visual Studio will add the Federation Metadata in the project and the configuration in Web.Config file.

Step 8: If we run the project and pass on to the certificate warning message, we will be getting a popup window for loging in with the Windows Server AD credentials we built in the first section of previous post.
Note: In all the images, I hidden the public domain name as it can be accessible thro' internet. So, please consider using your custom domain name whereever azurepoc.customdomain.com exist.


Once the login successfull, the browser will show the following error.

This error occur because there is no Relying Party Trust setup in the ADFS for the ACS namespace. We will do the same in the next section.
As we are planning to consume this AD FS into ACS, we must configure endpoint for that Virtual Machine to expose.
So open the Management Portal and navigate to the Virtual Machine created. Select the Endpoints tab and add two endpoints as below.
 |
| Opening Port 80 (for accessing normal websites) |
 |
| Opening Port 443 (for accessing SSL websites & ADFS) |
 |
| Final ports are opened for Virtual Machine |
Access the Federation metadata from Internet
Open the browser in any system which connected to internet and access the federation metadata with the url as defined below.
https://azurepoc.domainname.com/FederationMetadata/2007-06/FederationMetadata.xml
Here the domainname.com is my test domain and azurepoc is the sub domain created. You have to change as per the settings you have.
The browser must show the xml format metadata without any certificate error as below.

Sometime, when accessing the url in the browser, it never show the xml script. But, after I tried accessing it in Federation Urility window (Add STS Metadata), it starts working.
Note: If the federation metadata is not accessible to outside of the Virtual Machine and any certificate error shows on the address bar, this POC will not work :(.
Creating an MVC application
Step 1: Create an empty MVC application in Visual Studio with project name as ACSADFSFed. (I am creating MVC application with Basic MVC 4 template).


Step 2: Add control by right click the Control folder by selecting Add -> Controler menu. Name the controller as HomeController.

Step 3: Add a folder Home in the View folder by right click the View and selecting New Folder menu.
Step 4: Add a new view under the Home folder and name it as index by right click the Home folder and select View menu.

Step 5: Make sure the following Index method in the HomeController created in Step 2.
public ActionResult Index()
{
 return View();
}
Step 6: To consume ACS feature, we need the site running under IIS. So, open the Properties of the project and navigate to the Web tab. Select the Use Local IIS Web Server and press Create Virtual Directory button.
Visual Studio will create a Virtual Directory for that project.
Step 7: Run the application and verify runs without error.

Step 8: Note the url of the application. That will be used while configuring ACS.
Creating and Configuring ACS namespace
Step 1: Open Production Management Portal (http://windows.azure.com/) and select Service Bus, Access Control and Caching section.
Step 2: Select Access Control from the Services in the left panel and create a new namespace by selecting New icon. I am creating a new namespace TADFSTest.

Windows Azure will create a namespace with the mentioned name and bring active.
Step 3: Select the namespace created and press Access Control Service icon from the top.

Portal will show Access Control Service configuration portal.
Step 4: Select Identity Providers and click Add hyperlink to add a new identity provider.

Portal will bring you Add Identity Provider screen.
Step 5: Make sure WS-Federation identity provider (e.g. Microsoft AD FS 2.0) selected and press Next.
Step 6: Select URL option under the WS-Federation metadata section and provide the federation URL we tested previously (from Access the Federation metadata from Internet section).
Provide a meaningful descriptive name in the Display name and Login link text fields and press Save.

The portal will add the identity with ACS and show in the Identity Providers list.

Note: If the certificate is not trusted, there will be an error and will not add in the list.
Step 7: Select Relying Party Applications menu and click Add.

The portal will show Add Relying Party Application screen.
Step 8: Provide the details of the Relying Party Application as below
Name: Any descriptive understandable name
Realm and Return URL: Application URL which noted in Creating an MVC application Step 7.
Make sure the new Identity provider created is selected (that has our ADFS federation metadata) and Create new rule group is checked.

Save the details.
Step 9: Navigate to the Rule Group and select Default Rule Group for the Relying party just added (Default Rule Group for ACS ADFS Fed POC).

Step 10: Portal will open Edit Rule Group screen. Click Generate hyperlink.

Portal will show Generate Rules screen.
Step 11: Press Generate button. ACS will add all possible rules in the Rules list.

Note: As this is for testing, I am adding all possible rules. For production, we can add only which all required.
Step 11: Select the Application integration under Development section from the left panel and select the WS-Federation Metadata URL.

This metadata url will be used in our application for configuring ACS.
Consuming ACS namespace in Web application
Now, we have completed ACS settings. We can again switch to application and configure the ACS authentication.
Note: Make sure WIF and WIF SDK installed in the system and Add STS reference enabled in the menu when right click the application. Sometimes the Add STS reference menu won’t be enabled even the WIF SDK installed. To enable the menu, open the Visual Studio Command Prompt and navigate to the Common\IDE folder of Visual Studio installation path. For 32 bit system the path will be C:\Program Files\Microsoft Visual Studio 10.0\Common7\IDE.
Run the following command and restart the Visual Studio.
devenv /ResetAddin Microsoft.IdentityModel.Tools.VS.VSAddin.FederationAddin
Step 1: Right click the project and select Add STS reference.
Step 2: Fill the application url which was set in Project properties (Creating an empty MVC application -> Step 7) and press Next.

As my site url does not have SSL enabled, it will show a warning message. I press Yes.
Step 3: Select Use an existing STS and provide the WS-Federation Metadata URL noted from ACS in previous section.

Press Next.
Step 4: Press Next from STS signing certificate chain validation error screen as this is a testing site and we don’t want any certificate validation.

Step 5: Press Next from Security token encryption screen.
Step 6: Review the Offered claims and press Next.

Step 7: Review the Summary and press Finish.
Visual Studio will add the Federation Metadata in the project and the configuration in Web.Config file.
Step 8: If we run the project and pass on to the certificate warning message, we will be getting a popup window for loging in with the Windows Server AD credentials we built in the first section of previous post.
Note: In all the images, I hidden the public domain name as it can be accessible thro' internet. So, please consider using your custom domain name whereever azurepoc.customdomain.com exist.


 |
| Loging in with Administrator credentials on the Windows Server AD |
Once the login successfull, the browser will show the following error.

This error occur because there is no Relying Party Trust setup in the ADFS for the ACS namespace. We will do the same in the next section.
The other links on Configuring ACS for consuming ADFS and using in Web Application:
- Configuring ACS for consuming ADFS and using in Web Application - Part 1
- Configuring ACS for consuming ADFS and using in Web Application - Part 2
- Configuring ACS for consuming ADFS and using in Web Application - Part 3
0 Responses to “Configuring ACS for consuming ADFS and using in Web Application - Part 2”
Post a Comment