Previously we had seen implementing ACS with the Web Application for achieving SSO with public identities such as Live Id, Google Id, Yahoo Id and Facebook. In this post I am planning to walkthro’ exposing Active Directory to public using ADFS and configuring with ACS. Then our application can consume with applications using ACS. This allows us to extend our authentication requirement in more flexible and easy ways.
In this implementation, I am planning to use Windows Azure Virtual Machine for installing the AD and ADFS. The ADFS will be exposed to public using VM endpoint configuration.
Note:
Following are the steps I followed in this exercise.
Creating Virtual Machine
For creating a Virtual Machine I am planning to use Power Shell script instead of creating from Management Portal.
This script will create a Virtual Machine in the subscription and create a Cloud Services for that Virtual Machine.
Alternatively you can create a new VM using Management Portal. Following are the screen shot for the same.
Installing Active Directory in the Virtual Machine
Note: Before starting the next steps, make sure to configure a domain/sub-domain for the created Virtual Machine. Once that configuration successful, create a trusted certificate for that server and install the same in the server. The default Website must be able to request from outside with the domain configured.
Step 1: Connect to that Virtual Machine created and run the dcpromo.exe command in the Start -> Run window.
 Windows Server will install AD service in to the system.
 Step 2: The system will show the following wizard for configuring AD service.
Press Next.
Step 3: Press Next in the Operating System Compatibility screen.
 Step 4: Select Create a new domain in a new forest option and press Next in the Choose a Deployment Configuration window.
 Step 5: Provide the domain name in the Name the Forest Root Domain screen. For unique purpose, I provide the domain name as thirutestdc.com.
 Step 6: Select Windows Server 2008 R2 in the Set Forest Functional Level screen and press Next.
 System will examine the DNS configuration.
 Step 7: Check the DNS server in the Additional Domain Controller Options screen and press Next.
 Step 8: Select the Yes option in the Static IP assignment popup window.
 Step 9: Press Yes in the Active Directory Domain Service Installation Wizard popup window.
 Step 10: As this exercise in for testing I am not changing any folder directory locations in the Location for Database, Log files and SYSVOL screen.
 Press Next.
Step 11: Provide the administrator password and press Next.
 Step 12: Review the Summary and press Next. The server will install the Active Directory Domain Service. You can choose to restart the server once installation completed.


Installing ADFS in the Virtual Machine
As we are planning to expose the ADFS 2.0 to public, we need to download the ADFS 2.0 and install. For security reason, Windows Server does not allow to download any files from the net. To enable, open the IE ESC configuration from the Server Manager (under Security Information section) and switch off the configuration for Administrator.
 Step 1: Download ADFS 2.0 for 2008R2 64 bit OS from the following url
http://www.microsoft.com/en-us/download/details.aspx?id=10909
Step 2: Run the ADFS setup file. Press Next in the Welcome screen.
 Step 3: Wizard will show you the license agreement. Read & Accept and press Next.
 Step 4: Select the Federation server in the Server Role screen and press Next.
 Step 5: Press Next in the Install Prerequisite screen.
 Step 6: System will install the prerequisite software and show complete screen.
 Step 7: Make sure the Start the AD FS 2.0 Management snap-in when this wizard closes option checked in the Completed the AD FS 2.0 Setup Wizard and press Finish.
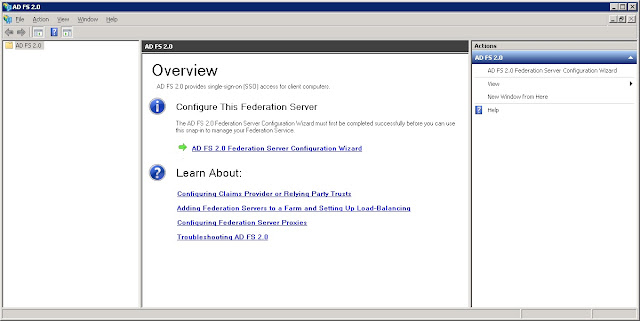
 Step 8: The server will open the AD FS 2.0 configuration window. Click the AD FS 2.0 Federation Server Configuration Wizard hyperlink which is located in center panel under Configure This Federation Server section.
 Step 9: The server will popup AD FS 2.0 Federation Server Configuration Wizard window. Make sure Create a new Federation Service option selected and press Next.
 Step 10: As this AD FS is for POC purpose, select Stand-alone federation server option and press Next.
 Step 11: In the SSL Certificate window, the certificate will be auto-selected when the SSL Certificate is installed in the IIS management console. So make sure the trusted certificate is imported in to the IIS Manager under Server Certificates section.
Note: If the certificate is not imported, import the certificate in the IIS Manager by running inetmgr in the Run command. Navigate to the server and double click Server Certificates icon. It will open the Server Certificate panel. Import the trusted certificate created.
 If the certificate imported after the screen show, just navigate to the previous screen in the wizard and press Next. It must be selected in the certificate name.
 Step 12: Review the summary and press Next.
 The system will install the AD FS into the server as below.

In the next post, we will see the other steps such as Creating and Configuring ACS namespace and Creating a Web Application and Consuming ACS namespace
In this implementation, I am planning to use Windows Azure Virtual Machine for installing the AD and ADFS. The ADFS will be exposed to public using VM endpoint configuration.
Note:
- The environment we are using here to expose the AD is for testing purpose. In production, we will not install AD and ADFS in single server and will not expose the ADFS directly to public. ADFS proxy will be installed in another server which acts as broker between external resource and the resource inside of the DMZ. But in our implementation we use only one server installing AD and ADFS together.
- When configuring ADFS federation metadata to ACS, it won’t accept if that is exposed using a self signed certificate i.e., certificate which has warning message. Normally for testing purpose we use self signed certificate. But when I use self certificate and configuring ADFS, it does not accepted by ACS while configuring. So to implement this implementation, make sure to configure the server IP address to a domain (or sub-domain) and get a trusted certificate for that domain (sub-domain) then install the certificate in that server.
For Example: I am creating a VM machine name with AzureTsDC and the cloud service url would be http://azuretestdc.cloudapp.net. I also created a sub-domain under my test domain and configured the VM VIP to that subdomain. I created and installed trusted certificate by requesting certificate from that server.
Following are the steps I followed in this exercise.
Creating Virtual Machine
For creating a Virtual Machine I am planning to use Power Shell script instead of creating from Management Portal.
Set-ExecutionPolicy RemoteSigned

# Importing Azure Power Shell Module
Import-Module "C:\Program Files (x86)\Microsoft SDKs\Windows Azure\PowerShell\Azure\Azure.psd1"

# Importing Azure Publisher Setting
Import-AzurePublishSettingsFile "C:\Users\Administrator\Downloads\Subscription-1-9-13-2012-credentials.publishsettings"

# Selecting Subscription
Select-AzureSubscription 'Subscription-1'

# Defining variable for password
$pass = 'thiru@123'

# Defining Image name
$W2KR2SP1 = 'MSFT__Win2K8R2SP1-Datacenter-201208.01-en.us-30GB.vhd'

# Defining New VM Configuration
$AzureTsDC = New-AzureVMConfig -Name 'AzureTsDC' -InstanceSize Small -ImageName $W2KR2SP1 |
 Add-AzureProvisioningConfig -Windows -Password $pass

# Creating VM
New-AzureVM -ServiceName 'AzureTestDC' -VMs $AzureTsDC -Location 'West Europe'
This script will create a Virtual Machine in the subscription and create a Cloud Services for that Virtual Machine.
Alternatively you can create a new VM using Management Portal. Following are the screen shot for the same.
Installing Active Directory in the Virtual Machine
Note: Before starting the next steps, make sure to configure a domain/sub-domain for the created Virtual Machine. Once that configuration successful, create a trusted certificate for that server and install the same in the server. The default Website must be able to request from outside with the domain configured.
Step 1: Connect to that Virtual Machine created and run the dcpromo.exe command in the Start -> Run window.
Press Next.
Step 3: Press Next in the Operating System Compatibility screen.
Step 11: Provide the administrator password and press Next.
Installing ADFS in the Virtual Machine
As we are planning to expose the ADFS 2.0 to public, we need to download the ADFS 2.0 and install. For security reason, Windows Server does not allow to download any files from the net. To enable, open the IE ESC configuration from the Server Manager (under Security Information section) and switch off the configuration for Administrator.

http://www.microsoft.com/en-us/download/details.aspx?id=10909
Step 2: Run the ADFS setup file. Press Next in the Welcome screen.


Note: If the certificate is not imported, import the certificate in the IIS Manager by running inetmgr in the Run command. Navigate to the server and double click Server Certificates icon. It will open the Server Certificate panel. Import the trusted certificate created.


In the next post, we will see the other steps such as Creating and Configuring ACS namespace and Creating a Web Application and Consuming ACS namespace
The other links on Configuring ACS for consuming ADFS and using in Web Application:
- Configuring ACS for consuming ADFS and using in Web Application - Part 1
- Configuring ACS for consuming ADFS and using in Web Application - Part 2
- Configuring ACS for consuming ADFS and using in Web Application - Part 3
0 Responses to “Configuring ACS for consuming ADFS and using in Web Application - Part 1”
Post a Comment